

How to Organize Crochet Projects: 7 Simple Systems
Table of Contents
- Why Your Crochet Projects Get Messy (And How to Fix It)
- How to Organize Crochet Projects: The 4-Box Method
- Crochet WIP Storage Ideas for Every Room
- How to Track Crochet Project Progress Without the Guesswork
- Best Printable Crochet Project Planner 2026: A Closer Look
- Digital Tools That Keep Your Patterns and Notes in Sync
- Common Organizing Mistakes to Avoid
- Conclusion: Build a System That Grows With You
- Frequently Asked Questions
Last Updated: September 4, 2026
Why Your Crochet Projects Get Messy (And How to Fix It)
If you have ever dug through three totes to find the hook you just put down, you already know the problem. Organizing crochet projects is about building a simple system that matches how you actually work, and the biggest reason most systems fail is that they treat every project the same.
At Crochet Creations Hub, we talk to makers daily who have a growing yarn stash, a half-finished blanket in a bag by the couch, and a pattern bookmarked on a phone. The clutter is rarely laziness. Crochet project organization is the process of giving every active project, material, and pattern a defined home, and most crafters skip this step because they are mid-project and just want to finish the row.
The fix starts with a mindset shift: your system should protect your work in progress, not just store it. Below, we will show you how to build one that takes ten minutes to set up and saves you hours of re-frogging and re-measuring later.
How to Organize Crochet Projects: The 4-Box Method
The most effective way to organize crochet projects is a simple sorting method that forces you to make decisions before you assign storage. Grab four boxes or laundry baskets and label them: Active, Next Up, Frogged, and Donate. This separates the emotional attachment to a project from the practical reality of your time.
Sort Your Stash: What Stays and What Goes
Work through your yarn stash and WIP pile one item at a time. If a project has been sitting untouched for over a year and you feel dread when you look at it, it goes in the Frogged box. If the yarn no longer sparks joy or was bought for a pattern you will never make, it goes in the Donate box. Be honest; keeping a project out of guilt is the fastest way to clutter a craft room.
Group Projects by Priority and Mood
For the Active and Next Up boxes, group by what you actually want to work on. Many crocheters have a "mindless" project (like a granny square blanket) for watching TV and a "focused" project (like amigurumi) for quiet evenings. Assign each project a bag or bin that holds the pattern, the yarn, and the correct hook size, and label it with the project name and yarn weight.
Crochet WIP Storage Ideas for Every Room
Most storage advice stops at "use a basket," but the real challenge is matching the container to the room's traffic, your posture, and the project's size. A better framework is to sort by how you access the project: daily-grab, weekly-rotate, or monthly-deep-storage.
Daily-Grab Zones: The Couch and Armchair
For the project you touch every day, the container must be open, stable, and within arm's reach of where you sit. A canvas tote with a flat bottom (roughly 12" x 12") works for a single blanket WIP because it stands upright on its own. A wooden yarn drum or a tall wicker basket with a lid (18"-24" tall) hides a larger afghan while keeping the working yarn feeding through a hole in the lid, this prevents the yarn ball from rolling across the floor. Avoid deep bins without a divider; hooks and stitch markers sink to the bottom, recreating the dig-and-search problem you are trying to solve.
Weekly-Rotate Zones: Bedroom and Home Office
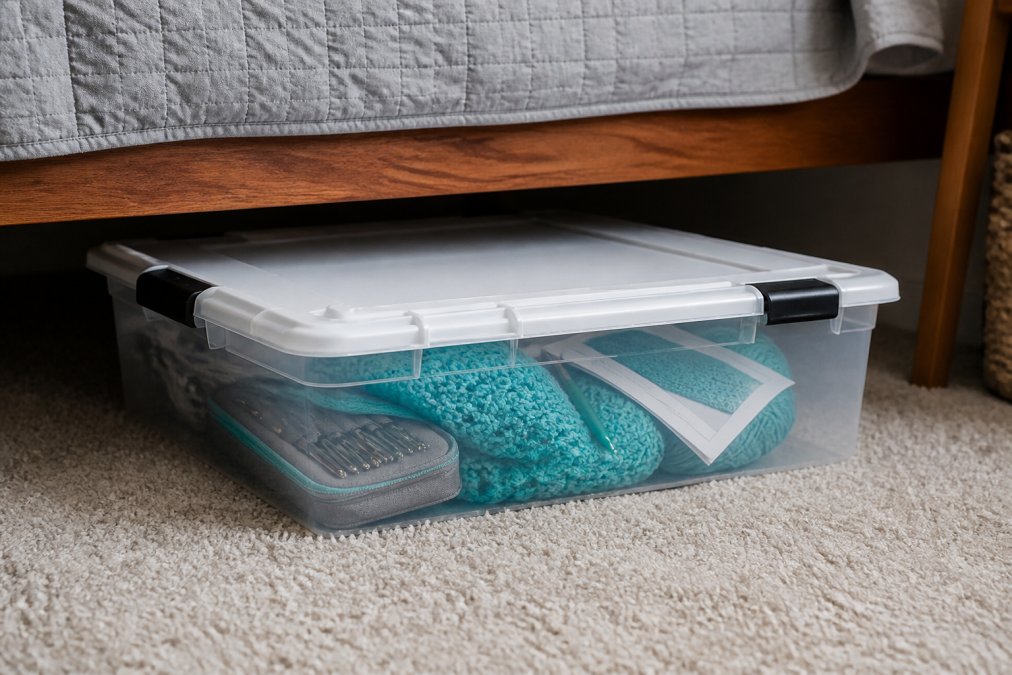
Projects you work on a few times a week need a home that does not compete with daily-use furniture. A clear, latching storage bin (16-quart size is a common sweet spot) slides under a bed or on a high shelf. Clear plastic is non-negotiable: you can identify the project without unstacking three bins. For a nightstand, a magazine holder is an underrated hack, it holds a small amigurumi project, the pattern printout, and a hook case in a slim, upright footprint that fits beside a lamp.
The Accessibility Angle Most Guides Miss
Standard advice assumes you can bend, lift, and see into deep containers. For crafters with chronic back pain, arthritis, or low vision, the storage system must be ergonomic first. Replace low, lidded bins with open-top containers placed at waist height, a rolling utility cart puts active projects at reach without bending. Use large-print, high-contrast labels (black text on white, minimum 16-point font) on the front of every bin, not the top (ada.gov). For limited hand mobility, swap zippered project bags for magnetic-closure or drawstring bags that open with one hand (the NIH). Crafters often abandon a system not because it is disorganized, but because it physically hurts to maintain it.

Space-Saving Hacks for Small Dwellings
If floor space is tight, think vertical and inside-out. Over-the-door shoe organizers with clear pockets hold individual skeins, small WIPs, and hook sets, turning a closet door into a visible yarn wall. Vacuum-seal bags compress finished-but-unblocked pieces or out-of-season yarn down to a fraction of their volume, though you must never vacuum-seal a WIP with a live row counter or stitch markers inside. A tension rod mounted inside a closet can hold shower curtain rings, and each ring carries a small project bag, creating a hanging queue of your Next Up projects that you can see at a glance.
The test of a good storage zone is simple: can you go from sitting down to crocheting in under thirty seconds without standing up again? If not, the container is working against you.
How to Track Crochet Project Progress Without the Guesswork
Tracking progress is where most guides miss the mark. A system that only stores physical items ignores the mental load of remembering what row you are on or how many skeins you have left. You need a method that captures the details you will forget.
Track Rows, Yardage, and Dye Lots in Minutes
The fastest way to track a project is to write it down the moment you put the work down. Keep a crochet journal or planner page in the project bag itself. Record the pattern name, the hook size, the yarn brand, and the dye lot. Dye lots matter more than most crafters realize; if you run out of yarn and need a match, a different dye lot can be visibly off.
For row counting, use a simple tally system or a row counter app. If you are working on a blanket, note the current length in inches. For amigurumi, note which round you are on. This eliminates the dreaded "frogging" that happens when you guess wrong and have to rip out hours of work.
Best Printable Crochet Project Planner 2026: A Closer Look
If you prefer a paper system over apps, a dedicated planner is the backbone of your organization. A good printable crochet project planner combines project tracking, yarn inventory, and a stitch journal in one place.
The free Ultimate Crochet Planner from Crochet Creations Hub is a 120-page printable that covers the full lifecycle of a project. It includes pages for a yarn stash inventory, so you can log what you have before you buy more, and dedicated project pages to track rows, yardage, and notes. Because it is a digital download, you can print only the pages you need or reprint a page when you start a new project, which makes it a budget-friendly alternative to a bound journal. For those who want a more simplified version, the Ultimate Crochet Planner with Project Tracker and Yarn Inventory offers the core tracking sheets at a lower cost.

Digital Tools That Keep Your Patterns and Notes in Sync
The physical storage system solves the "where is the yarn" problem, but a second, invisible layer of clutter lives on your phone and laptop: patterns scattered across email, screenshots in your camera roll, and PDFs buried in downloads. The fix is a deliberate digital workflow that mirrors your physical project bags. Most organizing guides skip this angle, they assume the pattern lives in a binder, but for most makers today, it lives on a screen.
Build a Folder Structure That Mirrors Your Physical Bins
Start with a cloud service (Google Drive, Dropbox, or iCloud) and create a top-level folder called Crochet Projects. Inside, create one subfolder per active project, named with a consistent convention: YYYY-MM_ProjectName (for example, 2026-09_GrannySquareBlanket). This date-first naming sorts your folder list chronologically, so the most recent project appears at the top without manual reordering. Inside each project folder, store three files: the pattern PDF, a photo of your gauge swatch, and a running notes document (Google Docs or Apple Notes).
Use Ravelry as Your Project Ledger, Not Just a Pattern Shop
Ravelry is the closest thing to an industry-standard project tracker. Beyond browsing patterns, its Project Pages feature lets you log the yarn brand, dye lot, hook size, and start date for each WIP. The key mechanism most crafters miss is the Stash integration: when you log a yarn in your Ravelry stash, you can link it directly to a project page, and the yardage is automatically deducted from your remaining total. This gives you a live count of how much yarn you have left without a calculator. The limitation is that Ravelry's interface is dated and not ideal for row-by-row notes, which is why it pairs best with a separate note-taking app.
The Trello or Notion Method for Row-Level Tracking
For crafters who want a visual kanban board, Trello or Notion offers a different mechanism. Create a board with lists for Active, Next Up, Frogged, and Finished. Each card represents one project. Inside the card, add a checklist for each major section of the pattern (e.g., "Front panel," "Sleeves," "Border") and check items off as you complete them. Attach photos of your progress directly to the card. The advantage over a paper journal is that your progress syncs across your phone, tablet, and computer, if you finish a row on your lunch break, you can update the card immediately. The trade-off is setup time: a Trello board takes about fifteen minutes to configure, and you must remember to update it, which is why it works best for crafters who already use digital task managers.
The Hybrid Sync Routine That Prevents Double-Entry
A common failure mode is maintaining both a paper planner and a digital tracker, then letting one fall out of date. The solution is a strict division of labor: the paper planner is the daily scratchpad (row counts, quick notes, yarn math), and the digital system is the weekly archive. Once a week, Sunday evening works for most, transfer the week's row counts and notes from paper into Ravelry or your Trello card, then photograph the paper page and attach it to the digital project folder. This takes five minutes and creates a searchable history. If you only update one system, make it the digital one, because it is searchable by project name, yarn, and date.
The goal is not to eliminate paper, many crafters find handwriting helps memory, but to ensure that every piece of project information has exactly one home. When the physical bag holds the yarn and the digital folder holds the pattern and progress log, you never have to search two places to answer the question, "What row am I on?"
Common Organizing Mistakes to Avoid
The most common mistake is over-buying storage containers before you have sorted your stash. Buying bins and baskets for yarn you plan to donate just creates more clutter. Sort first, then shop for storage.
Another frequent error is storing yarn without a label. If you have a bin of miscellaneous skeins, you will not remember the fiber content or dye lot six months later. Use a labeling system on the storage bin or on the yarn itself. Many organizers also forget to consider accessibility. If you have limited hand mobility or eyesight, prioritize open bins over lidded containers and use large-print labels. An ergonomic setup means the system is easy to maintain, not just pretty.
Conclusion: Build a System That Grows With You
The best time to organize crochet projects is before you start the next one. Decluttering your WIP pile and yarn stash frees up mental space, and a consistent tracking method ensures you never lose a row count again. Start with the 4-Box Method and one storage bin for your active work; do not try to overhaul an entire craft room in a single afternoon.
Your system will evolve as your skills and project types change. The printable planners and project bags available from Crochet Creations Hub are designed to flex with you, offering instant access to tracking tools the moment you need them. Get your free pattern and start your next project with a clear workspace and a clear head.
Frequently Asked Questions
What are the best ways to store unfinished crochet projects?
The best way to store a work in progress is to keep the project, its current yarn, the pattern, and the correct hook size together in one clear container or project bag. Clear bins let you see what's inside without opening everything. For larger blankets, use a dedicated basket or a Bonita project bag. Always re-wind half-used skeins into cakes to prevent tangling, and note the dye lot on a label before you store it away.
How do I keep track of my crochet patterns and notes?
For printed patterns, use sheet protectors in a binder organized by project type or yarn weight. For digital patterns, save them to a dedicated folder on your device and back them up to cloud storage. The most effective approach is to use a printable crochet project planner to record pattern names, hook sizes, yarn used, and personal notes like row counts or modifications, keeping everything in one searchable place.
What is the best printable crochet project planner for 2026?
The best printable crochet project planner for 2026 is one that fits your specific workflow. Look for a planner that includes dedicated pages for project tracking, yarn inventory, and a stitch journal. The free Ultimate Crochet Planner from Crochet Creations Hub is a strong choice because it offers 120 pages covering project logs, yarn labels, and gift planning, all in a printable PDF format you can use again and again.
How can I organize my yarn stash alongside my active projects?
Keep your active project yarn separate from your main yarn stash. Store WIP yarn in the project bag or bin with the project itself. For your main stash, organize by yarn weight first, then by color or fiber type. Use clear bins or a yarn cabinet to protect the yarn from dust and pests. Catalog your stash in a planner, noting the yardage and dye lot, so you know exactly what you have before you start a new project.
This article was written using GrandRanker